logo头像

学如逆水行舟

iOS MachineLearning 系列(22)——将其他三方模型转换成CoreML模型

iOS MachineLearning 系列(22)——将其他三方模型转换成CoreML模型

本篇文章将是本系列文章的最后一篇。本专题将iOS中有关Machine Learning的相关内容做了整体梳理。下面是专题中的其他文章地址,希望如果你有需要,本专题可以帮助到你。

iOS MachineLearning 系列(1)—— 简介

iOS MachineLearning 系列(2)—— 静态图像分析之矩形识别

iOS MachineLearning 系列(3)—— 静态图像分析之区域识别

iOS MachineLearning 系列(4)—— 静态图像分析之物体识别与分类

iOS MachineLearning 系列(5)—— 视频中的物体运动跟踪

iOS MachineLearning 系列(6)—— 视频中的物体轨迹分析

iOS MachineLearning 系列(7)—— 图片相似度分析

iOS MachineLearning 系列(8)—— 图片热区分析

iOS MachineLearning 系列(9)—— 人物蒙版图生成

iOS MachineLearning 系列(10)—— 自然语言分析之文本拆解

iOS MachineLearning 系列(11)—— 自然语言识别与文本分析

iOS MachineLearning 系列(12)—— 自然语言之词句相似性分析

iOS MachineLearning 系列(13)—— 语音与音频相关的 AI 能力

iOS MachineLearning 系列(14)—— 使用官方模型进行预测

iOS MachineLearning 系列(15)—— 可进行个性化更新的 CoreML 模型

iOS MachineLearning 系列(16)—— 几个常用的图片分类 CoreML 模型

iOS MachineLearning 系列(17)—— 几个常用的对象识别 CoreML 模型

iOS MachineLearning 系列(18)—— PoseNet,DeeplabV3 与 FCRN-DepthPrediction 模型

iOS MachineLearning 系列(19)—— 分析文本中的问题答案

iOS MachineLearning 系列(20)—— 训练生成 CoreML 模型

iOS MachineLearning 系列(21)——CoreML 模型的更多训练模板

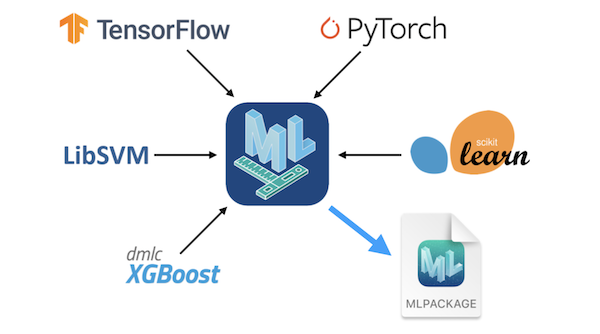
专题中,从iOS中Machine Learning相关的API开始介绍,后续扩展到如何使用模型进行预测,如何自定义的训练模型。其实CoreML框架只是Machine Learning领域内的一个框架而已,市面上还有许多流行的用来训练模型的框架。如TensorFlow,PyTorch,LibSVM等。在iOS平台中直接使用这些框架训练完成的模型是比较困难的,但是Core ML Tools提供了一些工具可以方便的将这些模型转换成CoreML模型进行使用,大大降低了模型的训练成本。

此工具官网:

https://coremltools.readme.io/docs

截屏2023-07-25 16.40.04.png

首先需要有安装Python运行环境,从Core ML Tools4.1版本开始将不再支持Python2,因此建议直接使用Python3。安装Python会默认安装pip工具,使用如下命令来安装Core ML Tools:

1
pip install coremltools

coremltools模块并不包含三方库(如TensorFlow),因此安装会比加快。

要使用三方的模型,需要做如下几步操作:

  1. 下载三方模型。
  2. 将三方模型转换为CoreML格式。
  3. 设置CoreML模型的元数据。
  4. 进行测试验证。
  5. 存储模型,之后在Xcode中进行使用即可。

其中最核心的是模型的转换和元数据的写入。

以TensorFlow的MobileNetV2模型为例,我们下面尝试将其转换成CoreML模型。要转换TensorFlow格式的模型,首先需要安装对应的框架,使用pip来安装如下依赖:

1
pip install tensorflow h5py pillow

第一步,下载三方模型,使用tensorflow框架提供的API可以将模型加载的到内存中去,代码如下:

1
2
3
4
5
6
7
import tensorflow as tf 

keras_model = tf.keras.applications.MobileNetV2(
weights="imagenet",
input_shape=(224, 224, 3,),
classes=1000,
)

其中applications.MobileNetV2是tensorflow框架中提供好的API,在此文档中可以查看这个API的更多用法:

https://www.tensorflow.org/api_docs/python/tf/keras/applications/mobilenet_v2/MobileNetV2

同时我们还需要下载一个索引文件,此文件定义了模型所能预测的标签数据,Python代码如下:

1
2
3
4
5
6
7
8
9
import urllib
# 模型对应的索引文件地址
label_url = 'https://storage.googleapis.com/download.tensorflow.org/data/ImageNetLabels.txt'
class_labels = urllib.request.urlopen(label_url).read().splitlines()
class_labels = class_labels[1:]
assert len(class_labels) == 1000
for i, label in enumerate(class_labels):
if isinstance(label, bytes):
class_labels[i] = label.decode("utf8")

下面进行模型的转换,直接使用coremltools模块提供的API即可,如下:

1
2
3
4
5
6
7
8
9
10
11
12
13
14
15
import coremltools as ct

# 定义输入
image_input = ct.ImageType(shape=(1, 224, 224, 3,),
bias=[-1,-1,-1], scale=1/127)

# 设置可预测的标签
classifier_config = ct.ClassifierConfig(class_labels)

# 进行模型转换
model = ct.convert(
keras_model,
inputs=[image_input],
classifier_config=classifier_config,
)

这一步做完成,实际上已经完整了核心的转换部分,我们还需要为model实例追加一些元数据,你应该还记得,将CoreML模型引入Xcode工程后,可以在Xcode中看到模型的简介和使用方法等信息,这些信息就是通过追加元数据写入的。上面实例代码中,默认将其转换成neuralnetwork(神经网络)模式的模型,转换模型时我们也可以选择了添加conver_to参数为mlprogram,这表示将模型转换成CoreML程序模式的。

写入元数据实例代码如下:

1
2
3
4
5
6
7
8
9
10
11
12
13
14
15
# 写入元数据
model.input_description["input_1"] = "输入要分类的图片"
model.output_description["classLabel"] = "最可靠的结果"

# 模型作者
model.author = "TensorFlow转换"

# 许可
model.license = "Please see https://github.com/tensorflow/tensorflow for license information, and https://github.com/tensorflow/models/tree/master/research/slim/nets/mobilenet for the original source of the model."

# 描述
model.short_description = "图片识别模型"

# 版本号
model.version = "1.0"

最后,就可以进行模型的导出了,代码如下:

1
2
# 存储模型
model.save("MobileNetV2.mlmodel")

需要注意,此时导出的模型格式,与前面转换成设置的模型类型有关,转换为mlprogram模式的模型需要导出mlpackage格式的,转换为neuralnetwork的模型需要导出为mlmodel格式的。

完整的Python文件代码如下:

1
2
3
4
5
6
7
8
9
10
11
12
13
14
15
16
17
18
19
20
21
22
23
24
25
26
27
28
29
30
31
32
33
34
35
36
37
38
39
40
41
42
43
44
45
46
47
48
49
50
51
52
53
54
import tensorflow as tf 
# 加载模型
keras_model = tf.keras.applications.MobileNetV2(
weights="imagenet",
input_shape=(224, 224, 3,),
classes=1000,
)


import urllib
# 模型对应的索引文件地址
label_url = 'https://storage.googleapis.com/download.tensorflow.org/data/ImageNetLabels.txt'
class_labels = urllib.request.urlopen(label_url).read().splitlines()
class_labels = class_labels[1:]
assert len(class_labels) == 1000
for i, label in enumerate(class_labels):
if isinstance(label, bytes):
class_labels[i] = label.decode("utf8")


import coremltools as ct

# 定义输入
image_input = ct.ImageType(shape=(1, 224, 224, 3,),
bias=[-1,-1,-1], scale=1/127)

# 设置可预测的标签
classifier_config = ct.ClassifierConfig(class_labels)

# 进行模型转换
model = ct.convert(
keras_model,
inputs=[image_input],
classifier_config=classifier_config,
)

# 写入元数据
model.input_description["input_1"] = "输入要分类的图片"
model.output_description["classLabel"] = "最可靠的结果"

# 模型作者
model.author = "TensorFlow转换"

# 许可
model.license = "Please see https://github.com/tensorflow/tensorflow for license information, and https://github.com/tensorflow/models/tree/master/research/slim/nets/mobilenet for the original source of the model."

# 描述
model.short_description = "图片识别模型"

# 版本号
model.version = "1.0"

# 存储模型
model.save("XMobileNetV2.mlmodel")

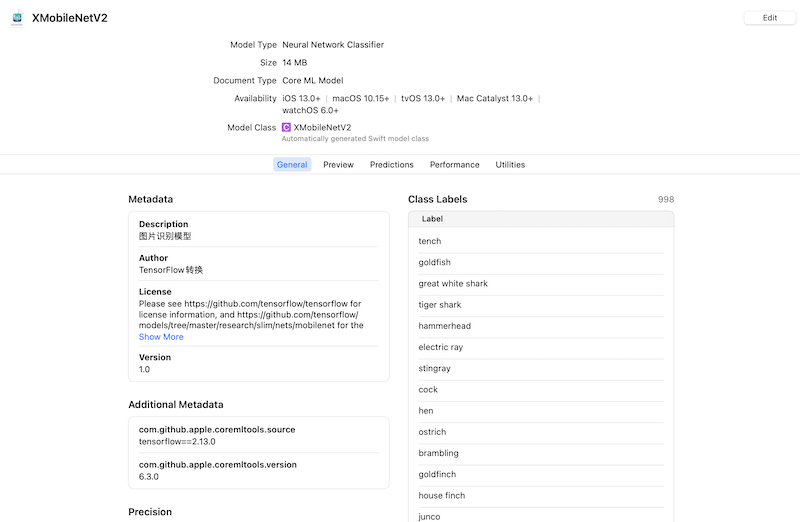
运行此Python脚本,如果没有报错,则会在当前脚本的同级目录下生成模型文件,下面我们可以将此模型文件引入到Xcode中,如下:
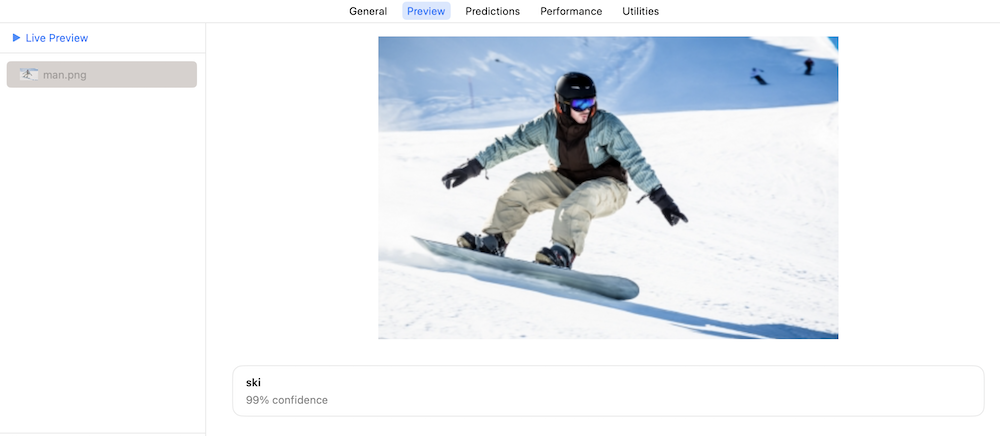
截屏2023-07-25 17.27.35.png

下面可以尝试下此模型的预测效果,如下:

截屏2023-07-25 17.28.52.png

可以看到,将三方模型转成成CoreML模型非常简单,同理对于PyTroch,LibSVM等模型也类似,安装对应的三方模块,读取模型后进行转换即可。